IIT Roorkee UAV & GNSS Field Work
As a Research Intern at IIT Roorkee, I ran UAV survey prep, GNSS ground control with Emlid Reach RS3 and Trimble DA, and photogrammetry workflows for accurate, georeferenced mapping outputs.

As a Research Intern at IIT Roorkee, I worked on UAV survey preparation, GNSS ground control, and photogrammetry workflows to produce accurate, georeferenced mapping outputs. My main job was tying drone imagery to real ground coordinates using survey grade GNSS receivers, the Emlid Reach RS3 and the Trimble DA, so the final orthomosaics and elevation models could be trusted for measurement.
Overview
This field work sat at the meeting point of two things I care about: capturing high resolution imagery from the air, and making sure that imagery is correct on the ground. A drone can fly a beautiful flight and still give you a map that is off by metres if the ground control is weak. So the project was as much about discipline in the field as it was about software back at the desk.
I was based at IIT Roorkee, in Roorkee, India, and the work covered the full chain. That means flight planning, setting and surveying ground control points, running the UAV mission, and then processing the images into usable products through a photogrammetry pipeline. The goal was repeatable accuracy, the kind you can defend in a report.
In short: I prepared UAV surveys, established GNSS ground control with the Emlid Reach RS3 and Trimble DA, and ran the imagery through photogrammetry to generate orthomosaics and digital surface models.
Approach
My approach was to treat ground control as the backbone of the whole survey, not an afterthought. Good photogrammetry depends on a small number of very well known points on the ground that the software can anchor to.
The plan followed a simple logic:
- Plan the flight first, so I knew the area, the overlap I needed, and roughly where control points should sit.
- Lock down the ground with GNSS before or alongside the flight, so every image could later be tied to true coordinates.
- Process carefully, checking accuracy at each stage rather than trusting the first output.
I leaned on two receivers for a reason. The Emlid Reach RS3 is a practical, multi band RTK receiver that is quick to set up in the field, and the Trimble DA gave me another survey grade source for positioning. Using survey grade GNSS, rather than a phone or a basic handheld, is what separates a map you can measure from a map you can only look at.
Methods
UAV survey preparation
Before any flight, I worked on the survey design. This covered the area of interest, the flight pattern, and the image overlap needed for a clean photogrammetric reconstruction. Enough forward and side overlap matters because the software needs to see each ground feature from many angles to solve its position. Weak overlap leaves holes and noise in the model.
I also thought about where ground control points would go. Control points need to be spread across the site, including near the edges and corners, because errors tend to grow where there is nothing to anchor the model.
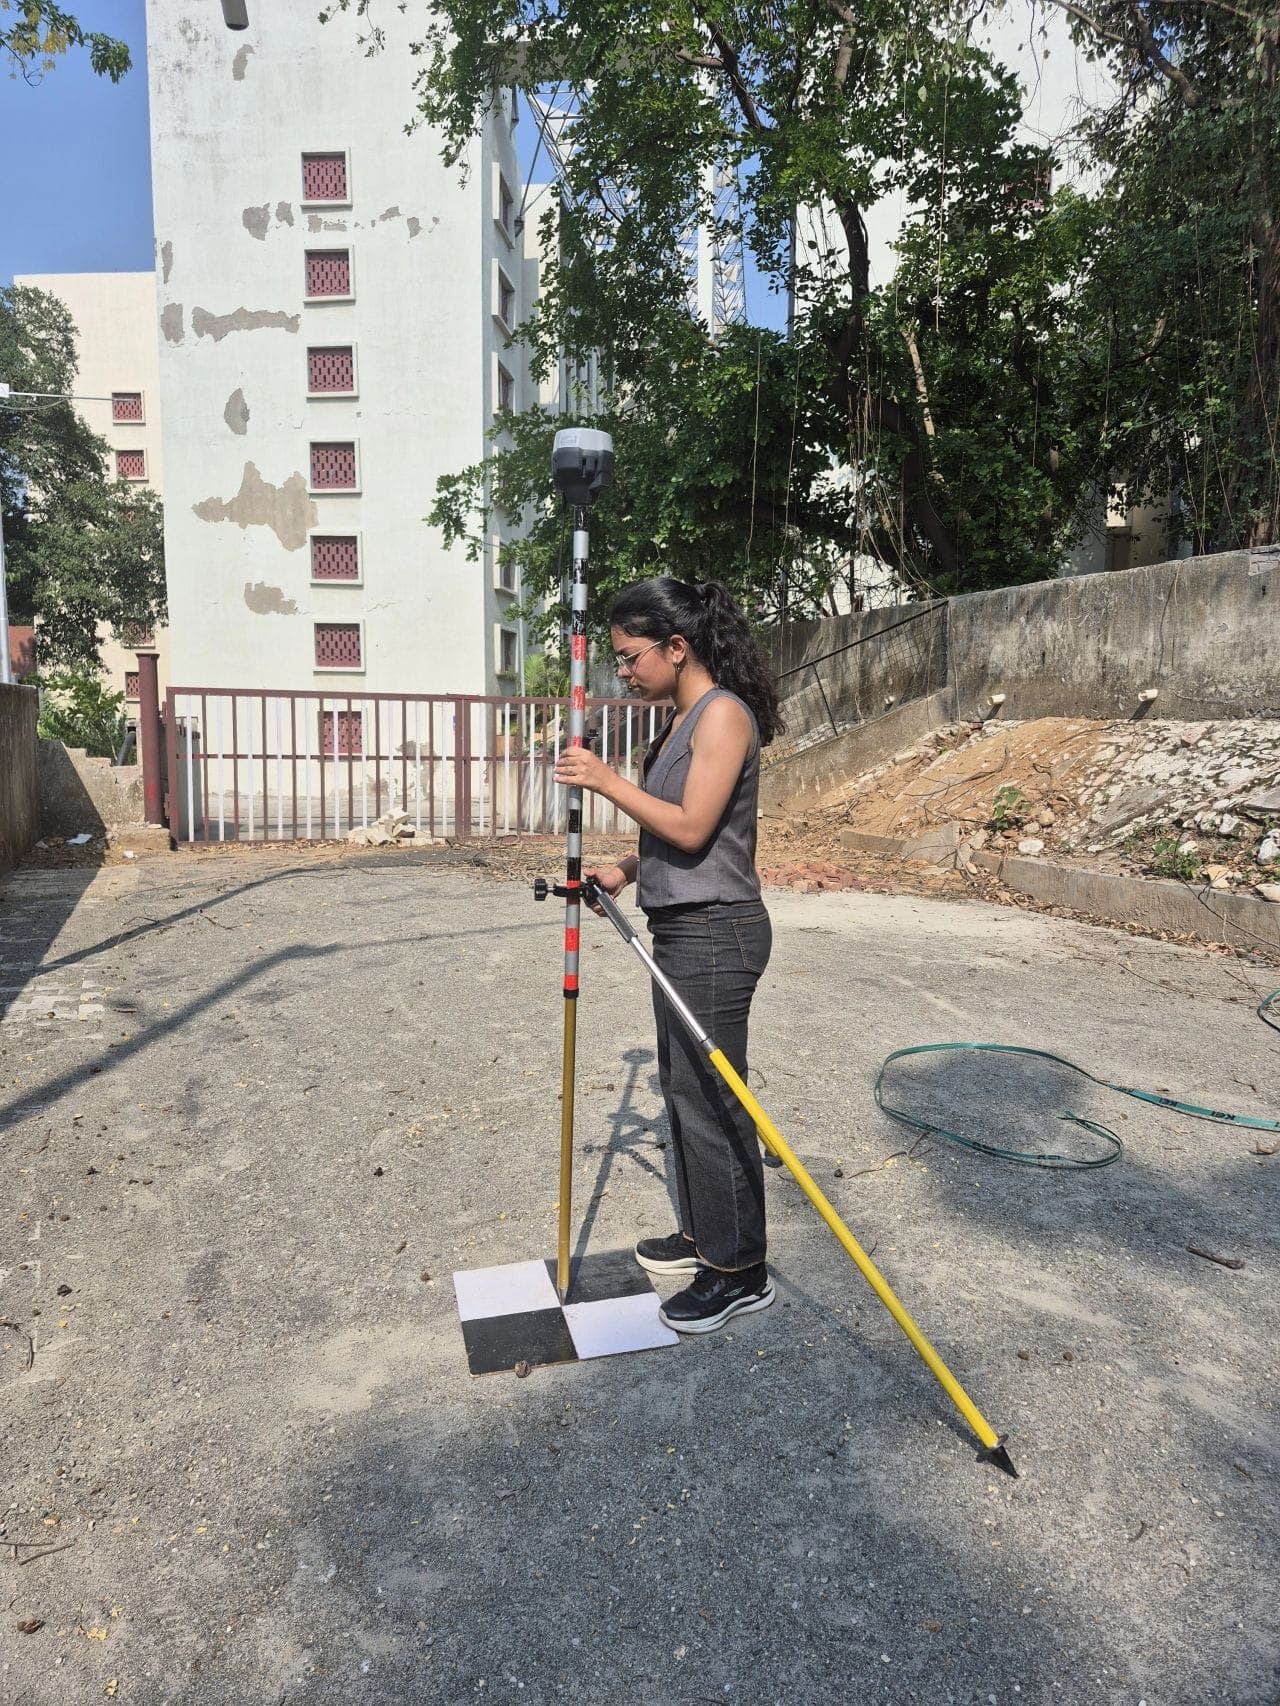
GNSS ground control with Emlid Reach RS3 and Trimble DA
This was the core of my contribution. I established ground control points using the Emlid Reach RS3 and the Trimble DA. The idea is straightforward but unforgiving in practice: place clear, identifiable markers on the ground, then measure each marker's position with the GNSS receiver to a high level of accuracy.
A few things I kept in mind in the field:
- Clear sky view for the receiver, away from trees and buildings that block or reflect satellite signals.
- Stable setup on the tripod, well centred over the marked point, because a few centimetres of carelessness here flows straight into the final map.
- Consistent logging of each point, so I could match every coordinate to the right physical target later.
Survey grade receivers like the RS3 and the DA let you work at far tighter tolerances than consumer GPS, which is exactly what UAV mapping needs if the output is going to support real measurement and analysis.
Photogrammetry workflows
With the imagery captured and the control points measured, the next stage was photogrammetry. The drone photos were processed into a connected model, and the surveyed ground control points were fed in to georeference and tighten that model.
The typical chain looked like this:
- Align the images and build the photo network.
- Bring in the GNSS ground control points to set the model into real world coordinates.
- Generate the dense outputs: a digital surface model and an orthomosaic.
- Review accuracy, checking how well the model agreed with the known control.
Tying the GNSS control into the photogrammetry is what converts a pile of overlapping photos into a measurable map.
Outcome
The field work gave me a complete, hands on understanding of how aerial mapping actually holds together, from a marker hammered into the ground to a finished orthomosaic. I came away comfortable with survey grade GNSS in real field conditions, and clearer about why ground control discipline decides the quality of everything downstream.
For my wider research, this was valuable experience. Most of my earlier work in Punjab and Delhi NCT used satellite data such as Sentinel-2 and Landsat, where the georeferencing is already handled for you. Doing the ground control myself at IIT Roorkee, in Roorkee, India, made the whole idea of spatial accuracy far more concrete.
What I took from it:
- Practical skill with the Emlid Reach RS3 and Trimble DA for RTK ground control.
- A working photogrammetry pipeline, from flight planning through to orthomosaic and surface model.
- A stronger instinct for where survey accuracy is won or lost, which is almost always in the field, not the software.
This experience now feeds directly into how I think about UAV and GNSS based mapping for environmental and geographic research across India.